
The app calculates the toolpaths from your drawing automatically whenever you change something. You only decide how each shape is cut. The toolpaths appear in blue on top of the drawing.
Cut type
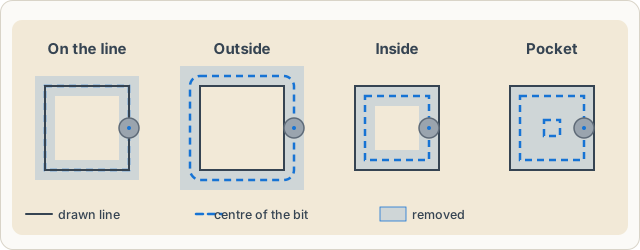
| Cut type | The bit … | Typical for |
|---|---|---|
| On the line | runs with its centre exactly on the line | engraving, grooves, lettering, open lines |
| Outside contour | runs outside the line; the part keeps its size | cutting parts out |
| Inside contour | runs inside the line; the hole keeps its size | holes, windows, cut-outs |
| clears the whole area to depth | recesses, trays, raised lettering (as the area around it) | |
| Do not cut | skips the shape | guide lines, templates |
Where do I set this?
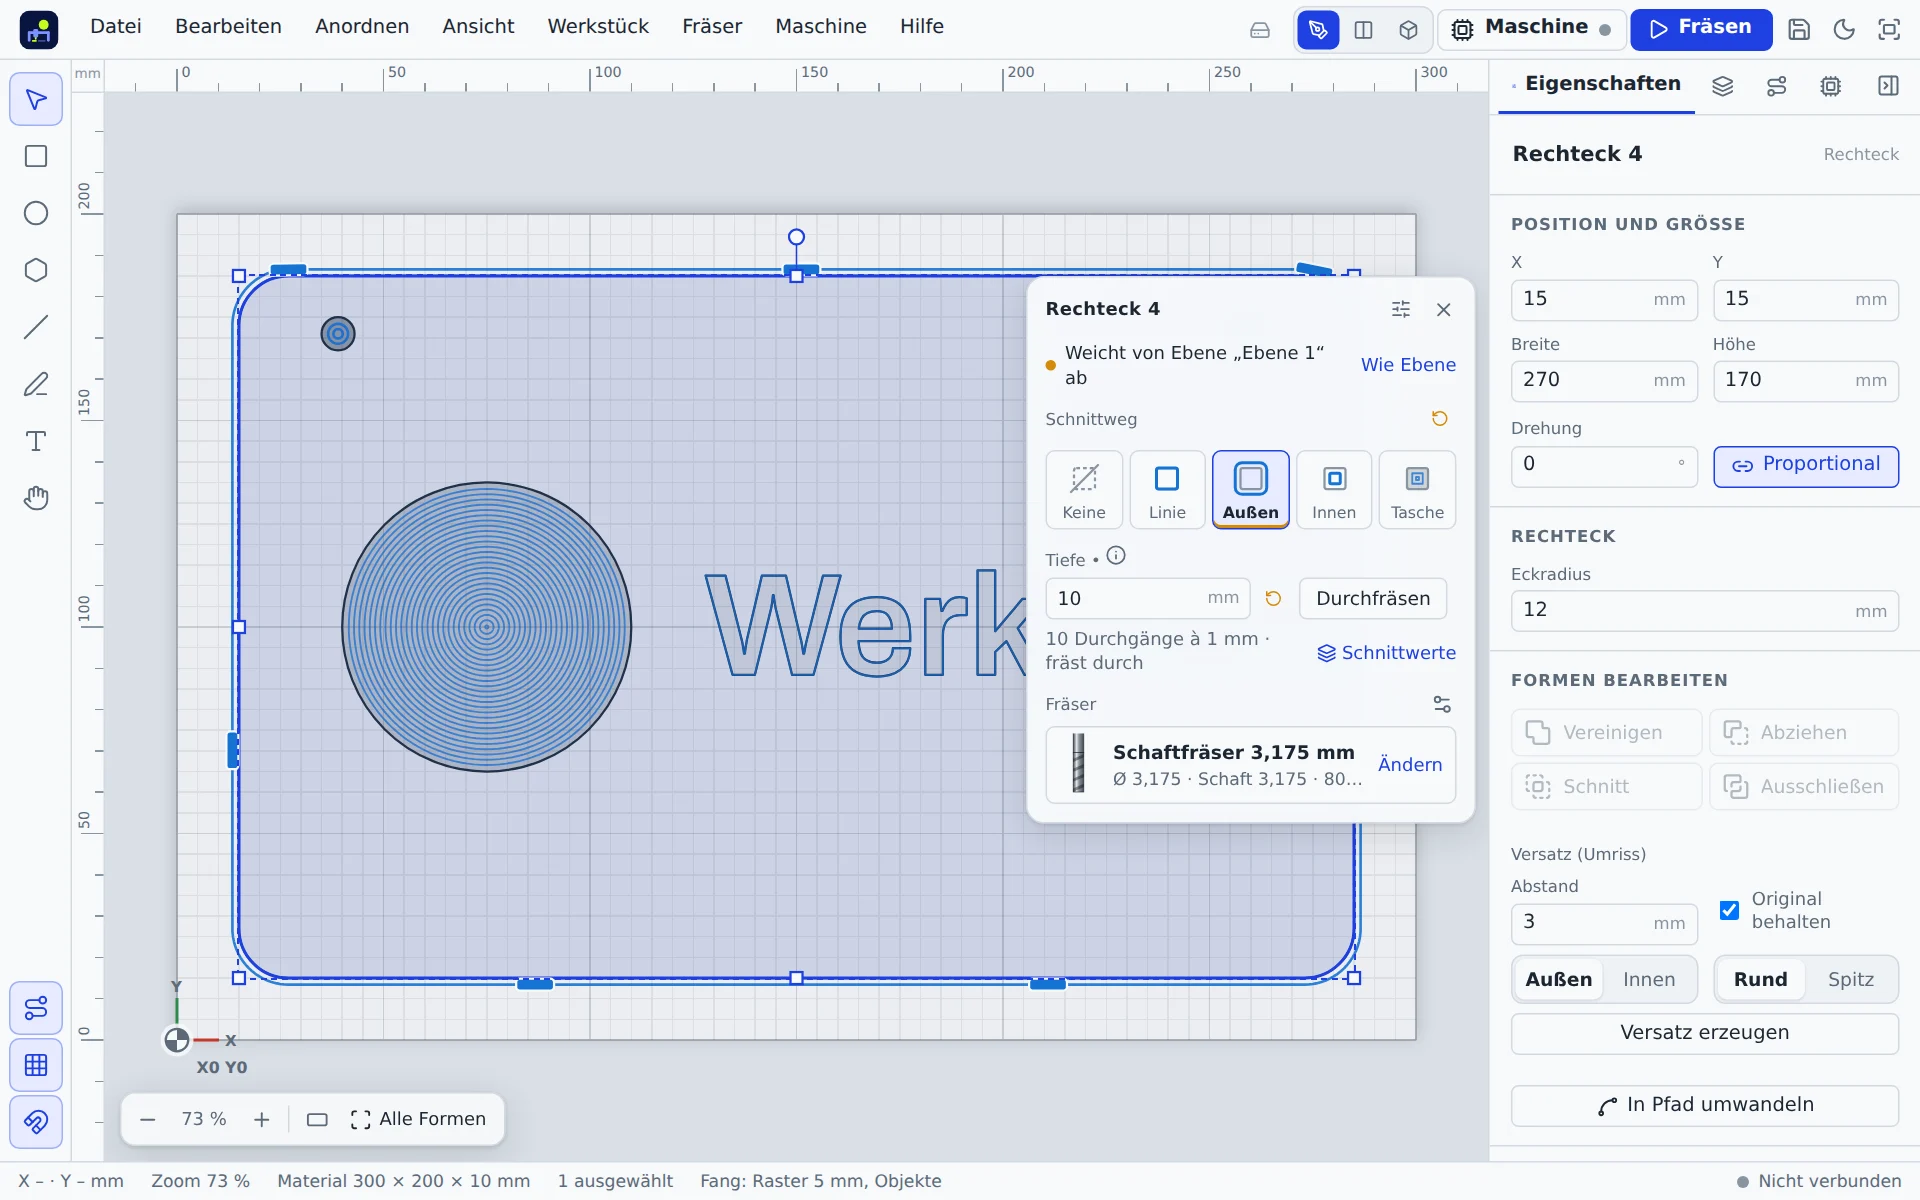
- Cut popup: click a shape and a small window with cut type, depth, cut through and bit appears next to it.
- Properties → Cutting in the right panel: the same values, plus holding tabs.
- Layers: the default for all shapes on a layer (Layers).
A shape takes the values of its layer until you set something different. Like layer resets it.
Cut depth
The depth is measured down from the material surface. The app splits it into equal passes; how deep each goes depends on the bit's step down (Cutting data). Below the field you see, for example, “3 passes of 1 mm”.
Cut through goes through the whole material and by the overcut into the spoilboard. The depth then follows the material thickness automatically. When cutting through, the app adds holding tabs.
Depth 0 = mask: A shape with depth 0 is not cut. It does limit every pocket and V-carve it overlaps – only the area where both shapes lie on top of each other is machined. Handy for cutting just a section of a large area.
Project-wide settings
With nothing selected, Properties → Cutting shows the settings for the whole project:
- Cut direction: climb gives clean edges in wood and plastic; conventional is gentler on light machines with backlash and suits aluminium.
- Pocket clearing: offset (rings parallel to the wall) for complex shapes, zigzag (straight passes at an adjustable path angle, with a final pass along the wall) for large simple areas.
- Overcut: how far cutting through goes into the spoilboard.
- Retract: short lift within one shape.
Plunge angle
The bit ramps into the material along the path instead of drilling straight down. This is gentler on bit and machine. 0° means straight down; 2° to 5° are good values.
Safe height
Between two shapes the bit rapids at this height above the material. It must be higher than all clamps, screws and hold-downs.
Order
The app cuts in a sensible order: engravings, then pockets, drill holes, inside contours and finally outside contours, so the part stays held until the end. Each bit becomes a separate part; in between the app asks you to change the bit.
The Cutting tab of the right panel lists all toolpaths per bit with their duration. Drag bits and toolpaths or use Alt+Up to reorder them. Order automatically restores the calculated order.
Carving a relief
The app carves a relief in two steps, optionally with a third. Set all of them in the relief's properties under Milling:
- Roughing with the roughing bit (ideally a large flat end mill): rows in steps of the depth per pass until the finishing allowance is left above the surface, on the slopes too. Without a roughing bit, the finishing bit clears in steps itself if the relief is deeper than its depth per pass.
- Finishing with the finishing bit (ideally a ball-nose bit): close rows that follow the surface. The row spacing in % of the diameter sets how smooth it gets; Both directions one after the other are even smoother but take twice as long.
- Rest machining with the rest machining bit (optional, a smaller ball-nose or tapered ball-nose bit): after finishing, it only machines the spots the finishing bit could not reach, such as narrow valleys, fine edges and steep walls. Where a lot was left, it goes down in steps of its depth per pass. The rest machining bit must be smaller than the finishing bit.
At every point the bit only goes down until its cutting edge touches the surface: it never cuts too deep, not even with its side. It cannot reach into valleys narrower than the bit; the rest machining bit helps there. Roughing comes first, then finishing, and rest machining last. The Milling tab lists all toolpaths with their time, and the 3D view shows the result with the real bits.
Height steps
Instead of 3D toolpaths, a relief can also be cut in height steps, like the layers of a contour map. In the properties under Height steps, choose the number of steps and click Split into … steps. Each step becomes its own layer with a pocket at its depth, cut with the roughing bit (or the largest end mill in the project). No step cuts deeper than the relief, so terraces remain. The relief itself is hidden and kept; Undo brings it back. With a cut-out, the cut-out shape trims the steps.
Finishing allowance
Under Settings → Carving you set the finishing allowance (0 to 5 mm, default 0 = single pass). For the cut types Outside and Inside the app then cuts two passes: first with the allowance (listed as “Name (+0.5 mm)”), then to size. This is easier on the bit and gives clean edges, because the last cut removes little material. Since it only removes the allowance sideways, the finishing pass uses twice the depth per pass (at most the flute length) and is correspondingly quick. Roughing always runs before finishing the same shape. For pockets the app clears the area leaving the allowance at the wall, then runs once around the wall to size (“Name (+0.5 mm)”).
Rest-machining bit for pockets and inside contours
A large bit clears a pocket quickly but leaves material in corners and curves. For the cut type Pocket you can also choose a rest-machining bit (a smaller flat or ball end mill). The large bit clears the area, then the small one cuts only what is left. For the cut type Inside the small bit cuts only the corners the large one cannot reach. In the Carving tab it appears as its own program “Name (Rest Ø x)”; the carve wizard guides you through the bit change. If the rest-machining bit is not smaller than the pocket bit or is not a flat or ball end mill, the app shows a note and does not use it.
Carving goal: fast or fine
At the top of the Milling tab you choose what matters for the whole workpiece. Each option shows how long carving takes with it and how many percent faster or slower that is than the selected option.
- Fast: about a third more depth per pass and stepover (at most up to the flute length, the bit diameter and 60 % stepover), coarser relief rows and V-carve flanks, no finishing pass. Good for rough parts, test cuts and parts that will be sanded anyway.
- Balanced: carves with the bits' cutting values as set in the bit library. This is the default.
- Best quality: about 20 % less depth per pass and 30 % less stepover, finer relief rows and V-carve flanks, and a finishing pass with at least 0.2 mm allowance on outside and inside contours.
The carving goal does not change feed rate or spindle speed: they suit your machine and appear like that in the carving assistant. The bits' values in the project stay the same; the goal only applies when the toolpaths are calculated and is saved with the project. Undo restores the previous goal.
Notes and warnings
Whatever cannot be cut is shown in red: spots the bit does not fit into, shapes that are too narrow, paths outside the material. The list of notes is under “Ready to carve”, in the Cutting tab and in the cut popup; clicking one selects the affected shapes. Usually a smaller bit or a different cut type helps.