
The gallery holds more than 60 carefully designed projects: signs, kitchen helpers, finger-jointed boxes, games, workshop holders, decor, electronics, 3D reliefs (rosette, waves, sun, leaf, shell, crest and rounded figures) and test pieces for learning. Every template comes with material, layers, cutting depths and matching bits from the library.

Finding a template
Open File → Templates … or File → New → From template. The search box finds titles, descriptions and keywords such as “box”, “Christmas” or “Arduino”. On the left you narrow the choice:
- Category, Material and Difficulty.
- Fits: My machine shows only templates that fit the work area of the selected machine, also rotated by 90°.
- Type: Fixed templates are finished designs, Adjustable ones let you change size, text, shape or font.
Every card shows the estimated milling time and the bits, briefly as diameter (“Ø 3.175”) or tip angle (“V 60°”). “Too large” means the template is larger than your machine by default.
Adjusting
Click a card to open the template in a large view. For adjustable templates you change sizes, texts, shapes and fonts on the right; the preview, milling time and bit list update immediately. Reset to defaults puts all sliders back.
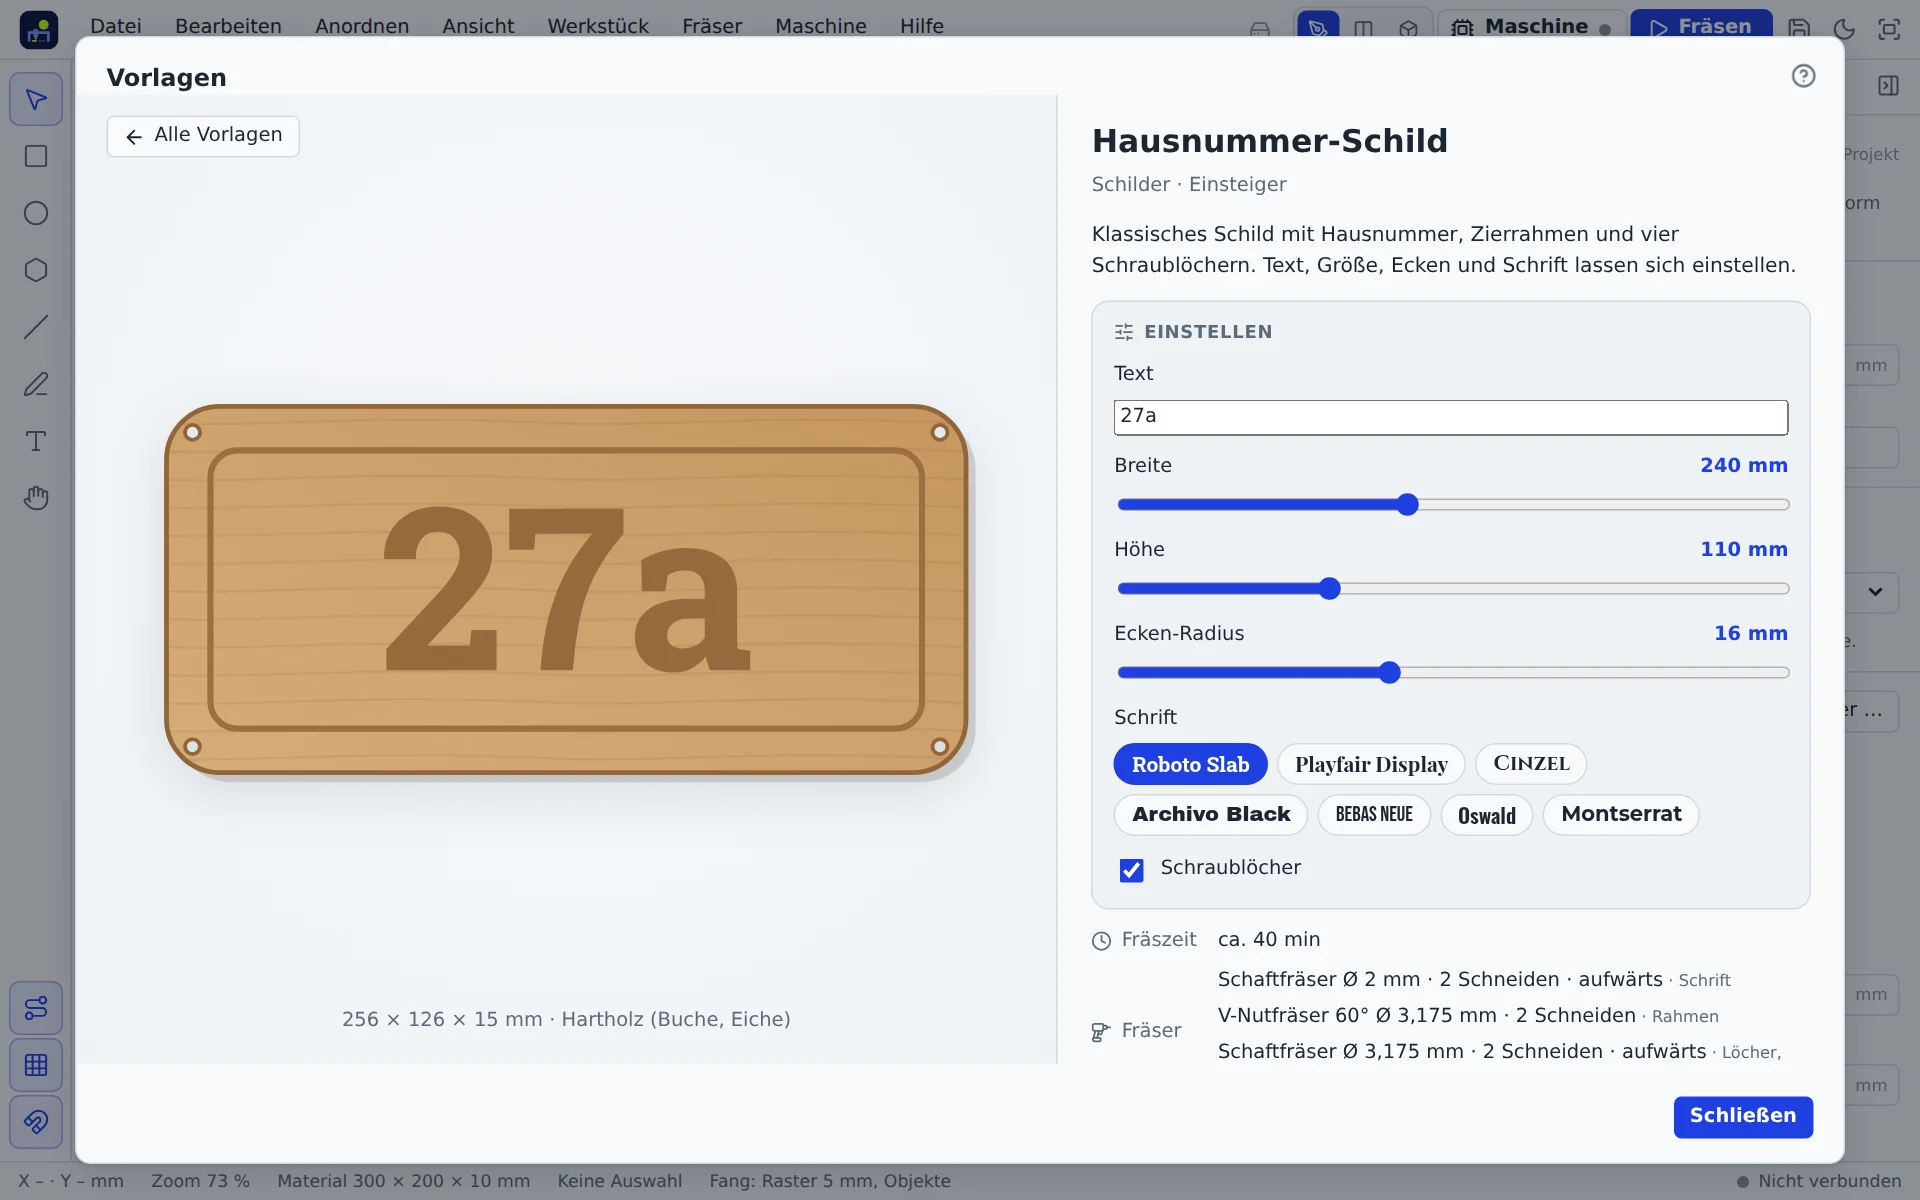
Below the preview you see the workpiece size and material. The note underneath tells you whether the workpiece fits your machine.
Opening as a project
Open as project creates a new project of your own from the template. If the current project has unsaved changes, the app asks first. View in 3D opens the project straight in the 3D view with the cutting simulation.
From then on everything works like your own drawing: shapes, texts, layers, depths and bits can all be changed. Before milling, check the material thickness under Workpiece and the bits in the Cutting tab.
Sign wizard
File → New → Sign and engraving opens the sign wizard. On the left you see the finished sign; on the right you choose step by step:
- Shape and size: outline (rounded, rectangle, oval, arch, notched, shield), width and height.
- Text: up to three lines and the font. The first line is set largest; each line adapts to the free width.
- Motif: heart, star or one of the free motifs, left of the text or above it.
- Engraving: V-carving with a V-bit and crisp edges, Recessed with a flat bottom, or Raised, where the letters stay and the background is cleared. Plus depth and border.
- Workpiece: material, thickness and screw holes.
Milling time, bits and whether the sign fits your machine update immediately. Create sign opens a normal project: text, border, holes and outline sit on their own layers and stay editable. The wizard remembers your last choices.
Build guide for the example boards
The example boards in the Circuit boards category come with a build guide; their cards carry the “Build guide” badge. In the detail view, Open build guide opens it; in an opened project you find it under File → Build guide ….
- Component layout: milled boards have no silkscreen. The layout shows the component side with outlines, polarity, reference designators (R1, C1 …) and, if you like, the values and the names of the connections. Point at a row in the parts list and the matching parts light up in the layout.
- Parts: quantity, value, colour bands of the resistors and polarity hints; IC sockets, heat sinks and accessories are already included.
- Assembly and Test: from milling through soldering to switching on for the first time, step by step to tick off.
Print puts the layout, parts list and all steps on A4, so the guide lies next to the board while you solder.
Motifs and licences
The templates are original designs. Some use motifs from free icon collections released under CC0, which may be used without conditions. Such templates carry a “CC0” badge on their card; the detail view names the work, collection, licence and retrieval date with a link to the source. You may therefore use these motifs freely in your own workpieces.